Вложенные layout
Одна layout может содержать другую layout. Для этого применяется элемент include.
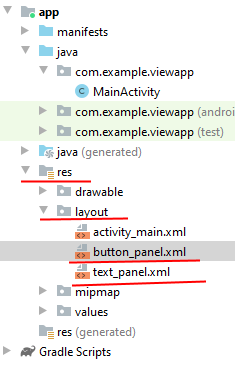
Например, добавим в папку res/layout два файла layout, которые пусть будут называться text_panel.xml и button_panel.xml:
В файле text_panel.xml определим следующий код:
<?xml version="1.0" encoding="utf-8"?>
<androidx.constraintlayout.widget.ConstraintLayout
    xmlns:android="http://schemas.android.com/apk/res/android"
    xmlns:app="http://schemas.android.com/apk/res-auto"
    android:layout_width="wrap_content"
    android:layout_height="wrap_content">
    <TextView
        android:id="@+id/clicksText"
        android:layout_width="wrap_content"
        android:layout_height="wrap_content"
        android:textSize="30sp"
        android:text="0 Clicks"
        app:layout_constraintLeft_toLeftOf="parent"
        app:layout_constraintTop_toTopOf="parent"
        />
</androidx.constraintlayout.widget.ConstraintLayout>
По сути здесь просто определено поле TextView для вывода текста.
В файле button_panel.xml определим следующую разметку:
<?xml version="1.0" encoding="utf-8"?>
<androidx.constraintlayout.widget.ConstraintLayout
    xmlns:android="http://schemas.android.com/apk/res/android"
    xmlns:app="http://schemas.android.com/apk/res-auto"
    android:layout_width="wrap_content"
    android:layout_height="wrap_content">
    <Button
        android:layout_width="wrap_content"
        android:layout_height="wrap_content"
        android:text="Click"
        android:onClick="onClick"
        app:layout_constraintLeft_toLeftOf="parent"
        app:layout_constraintTop_toTopOf="parent"
        />

</androidx.constraintlayout.widget.ConstraintLayout>
Здесь определена кнопка, нажатия которой мы будем обрабатывать.
Основным файлом разметки, который определяет интерфейс приложения, по-прежнему является activity_main.xml. Изменим его:
<?xml version="1.0" encoding="utf-8"?>
<androidx.constraintlayout.widget.ConstraintLayout
    xmlns:android="http://schemas.android.com/apk/res/android"
    xmlns:app="http://schemas.android.com/apk/res-auto"
    xmlns:tools="http://schemas.android.com/tools"
    android:layout_width="match_parent"
    android:layout_height="match_parent"
    android:padding="16dp"
    tools:context=".MainActivity">

    <include
        android:id="@+id/textView"
        layout="@layout/text_panel"
        android:layout_width="wrap_content"
        android:layout_height="wrap_content"
        app:layout_constraintLeft_toLeftOf="parent"
        app:layout_constraintTop_toTopOf="parent"
        app:layout_constraintBottom_toTopOf="@+id/button"
        />
    <include
        android:id="@+id/button"
        layout="@layout/button_panel"
        android:layout_width="wrap_content"
        android:layout_height="wrap_content"
        app:layout_constraintLeft_toLeftOf="parent"
        app:layout_constraintTop_toBottomOf="@+id/textView"
        />

</androidx.constraintlayout.widget.ConstraintLayout>
С помощью ConstraintLayout весь интерфейс здесь организуется в виде вертикального стека. С помощью элементов include внутрь ConstraintLayout добавляется содержимое файлов text_panel.xml и button_panel.xml. Для указания названия файла применяется атрибут layout.
Это все равно, что если бы мы напрямую вместо элемента include добавили содержимое файлов. Однако такой способ имеет свои преимущества. Например, какая-то часть разметки, группа элементов управления может повторяться в различных activity. И чтобы не определять по сто раз эти элементы, можно вынести их в отдельный файл layout и с помощью include подключать их.
После добавления в ConstraintLayout к элементам include можно применять все те стандартные атрибуты, которые применяются в этом контейнере к вложенным элементам, например, настроить размеры, расположение. Также стоит отметить, что добавлять внешние layout можно не только в ConstraintLayout, но и в другие контейнеры (LinearLayout, RelativeLayout и т.д.)
Также изменим код MainActivity:
package com.example.viewapp;

import androidx.appcompat.app.AppCompatActivity;

import android.os.Bundle;
import android.view.View;
import android.widget.TextView;

public class MainActivity extends AppCompatActivity {

    int clicks = 0;
    @Override
    protected void onCreate(Bundle savedInstanceState) {
        super.onCreate(savedInstanceState);
        setContentView(R.layout.activity_main);
    }

    public void onClick(View view){
        TextView clicksText = findViewById(R.id.clicksText);
        clicks++;
        clicksText.setText(clicks + " Clicks");
    }
}
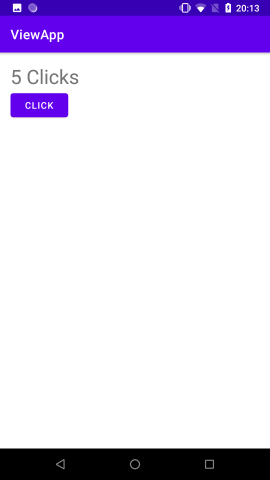
В MainActivity мы можем обращаться к элементам во вложенных файлах layout. Например, мы можем установить обработчик нажатия кнопки, в котором при нажатии изменять текст в TextView.
При этом мы несколько раз можем добавлять в один файл layout другой файл layout. Для этого вначале изменим файл button_panel.xml следующим образом:
<?xml version="1.0" encoding="utf-8"?>
<androidx.constraintlayout.widget.ConstraintLayout
    xmlns:android="http://schemas.android.com/apk/res/android"
    xmlns:app="http://schemas.android.com/apk/res-auto"
    android:layout_width="wrap_content"
    android:layout_height="wrap_content"
    android:background="#3F51B5"
    android:paddingTop="10dp"
    android:paddingBottom="10dp">
    <Button
        android:id="@+id/clickBtn"
        android:layout_width="wrap_content"
        android:layout_height="wrap_content"
        app:layout_constraintLeft_toLeftOf="parent"
        app:layout_constraintTop_toTopOf="parent"
        />

</androidx.constraintlayout.widget.ConstraintLayout>
И изменим файл activity_main.xml:
<?xml version="1.0" encoding="utf-8"?>
<androidx.constraintlayout.widget.ConstraintLayout
    xmlns:android="http://schemas.android.com/apk/res/android"
    xmlns:app="http://schemas.android.com/apk/res-auto"
    xmlns:tools="http://schemas.android.com/tools"
    android:layout_width="match_parent"
    android:layout_height="match_parent"
    android:padding="16dp"
    tools:context=".MainActivity">

    <include
        layout="@layout/text_panel"
        android:layout_width="wrap_content"
        android:layout_height="wrap_content"
        app:layout_constraintLeft_toLeftOf="parent"
        app:layout_constraintTop_toTopOf="parent"
        />
    <include layout="@layout/button_panel"
        android:id="@+id/plus_button"
        android:layout_width="wrap_content"
        android:layout_height="wrap_content"
        app:layout_constraintLeft_toLeftOf="parent"
        app:layout_constraintBottom_toBottomOf="parent"
        app:layout_constraintRight_toLeftOf="@+id/minus_button"/>

    <include layout="@layout/button_panel"
        android:id="@+id/minus_button"
        android:layout_width="wrap_content"
        android:layout_height="wrap_content"
        android:layout_marginLeft="36dp"
        app:layout_constraintLeft_toRightOf="@id/plus_button"
        app:layout_constraintBottom_toBottomOf="parent"/>

</androidx.constraintlayout.widget.ConstraintLayout>
Теперь файл button_panel.xml добавляется два раза. Важно, что при добавлении этого файла каждому элементу include присвоен определенный id. По этому id мы сможем узнать, о каком именно элементе include идет речь.
Также изменим MainActivity:
package com.example.viewapp;

import androidx.appcompat.app.AppCompatActivity;

import android.os.Bundle;
import android.view.View;
import android.widget.Button;
import android.widget.TextView;

public class MainActivity extends AppCompatActivity {

    int clicks = 0;
    @Override
    protected void onCreate(Bundle savedInstanceState) {
        super.onCreate(savedInstanceState);
        setContentView(R.layout.activity_main);

        View plusButtonView = findViewById(R.id.plus_button);
        View minusButtonView = findViewById(R.id.minus_button);
        TextView clicksText = findViewById(R.id.clicksText);

        Button plusButton = plusButtonView.findViewById(R.id.clickBtn);
        Button minusButton = minusButtonView.findViewById(R.id.clickBtn);

        plusButton.setText("+");
        minusButton.setText("-");

        plusButton.setOnClickListener(v -> {
            clicks++;
            clicksText.setText(clicks + " Clicks");
        });
        minusButton.setOnClickListener(v -> {
            clicks--;
            clicksText.setText(clicks + " Clicks");
        });
    }
}
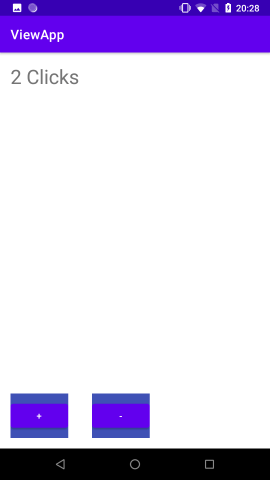
Здесь вначале мы получаем отдельные элементы include по id. Затем в рамках этих элементов получаем кнопку. После этого мы можем установить у кнопко любой текст и повесить обработчик события нажатия. И таким образом, поведение обеих кнопок будет различаться.
- Глава 1. Начало работы с Android
- Глава 2. Основы создания интерфейса
- Создание интерфейса в коде java
- Определение интерфейса в файле XML. Файлы layout
- Определение размеров
- Ширина и высота элементов
- Внутренние и внешние отступы
- ConstraintLayout
- Размеры элементов в ConstraintLayout
- Цепочки элементов в ConstraintLayout
- Программное создание ConstraintLayout и позиционионирование
- LinearLayout
- RelativeLayout
- TableLayout
- FrameLayout
- GridLayout
- ScrollView
- Вложенные layout
- Gravity и позиционирование внутри элемента
- Глава 3. Основные элементы управления
- Глава 4. Ресурсы
- Глава 5. Activity
- Глава 6. Работа с изображениями
- Глава 7. Адаптеры и списки
- ListView и ArrayAdapter
- Ресурс string-array и ListView
- Выбор элемента в ListView
- Добавление и удаление в ArrayAdapter и ListView
- Расширение списков и создание адаптера
- Оптимизация адаптера и View Holder
- Сложный список с кнопками
- Выпадающий список Spinner
- Виджет автодополнения AutoCompleteTextView
- GridView
- RecyclerView
- Обработка выбора элемента в RecyclerView
- Глава 8. Стили и темы
- Глава 9. Меню
- Глава 10. Фрагменты
- Глава 11. Многопоточность
- Глава 12. Работа с сетью. WebView
- Глава 13. Работа с мультимедиа
- Глава 14. Настройки и состояние приложения
- Глава 15. Работа с файловой системой
- Глава 16. Работа с базами данных SQLite
- Глава 17. Перелистывание страниц и ViewPager2
- Глава 18. Сервисы
- Глава 19. Диалоговые окна
- Глава 20. Анимация
- Глава 21. Провайдеры контента
- Глава 22. JSON
- Глава 23. Работа с XML