Создание провайдера контента. Часть 3
В прошлой теме был определен провайдер контента. Рассмотрим, как его использовать. Сначала определим простейший визуальный интерфейс для тестирования возможностей провайдера в файле activity_main.xml:
<?xml version="1.0" encoding="utf-8"?>
<androidx.constraintlayout.widget.ConstraintLayout
    xmlns:android="http://schemas.android.com/apk/res/android"
    xmlns:app="http://schemas.android.com/apk/res-auto"
    android:layout_width="match_parent"
    android:layout_height="match_parent" >

    <Button
        android:id="@+id/getButton"
        android:layout_width="0dp"
        android:layout_height="wrap_content"
        android:text="Get"
        android:onClick="getAll"
        app:layout_constraintBottom_toTopOf="@id/addButton"
        app:layout_constraintLeft_toLeftOf="parent"
        app:layout_constraintRight_toRightOf="parent"
        app:layout_constraintTop_toTopOf="parent" />

    <Button
        android:id="@+id/addButton"
        android:layout_width="0dp"
        android:layout_height="wrap_content"
        android:text="Add"
        android:onClick="add"
        app:layout_constraintBottom_toTopOf="@id/updateButton"
        app:layout_constraintLeft_toLeftOf="parent"
        app:layout_constraintRight_toRightOf="parent"
        app:layout_constraintTop_toBottomOf="@id/getButton" />

    <Button
        android:id="@+id/updateButton"
        android:layout_width="0dp"
        android:layout_height="wrap_content"
        android:text="Update"
        android:onClick="update"
        app:layout_constraintBottom_toTopOf="@id/deleteButton"
        app:layout_constraintLeft_toLeftOf="parent"
        app:layout_constraintRight_toRightOf="parent"
        app:layout_constraintTop_toBottomOf="@id/addButton" />

    <Button
        android:id="@+id/deleteButton"
        android:layout_width="0dp"
        android:layout_height="wrap_content"
        android:text="Delete"
        android:onClick="delete"
        app:layout_constraintLeft_toLeftOf="parent"
        app:layout_constraintRight_toRightOf="parent"
        app:layout_constraintTop_toBottomOf="@id/updateButton" />

</androidx.constraintlayout.widget.ConstraintLayout>
Здесь определен набор кнопок для вывода списка друзей, а также добавления, обновления и удаления. Каждая кнопка будет вызывать соответсствующий метод в классе MainActivity.
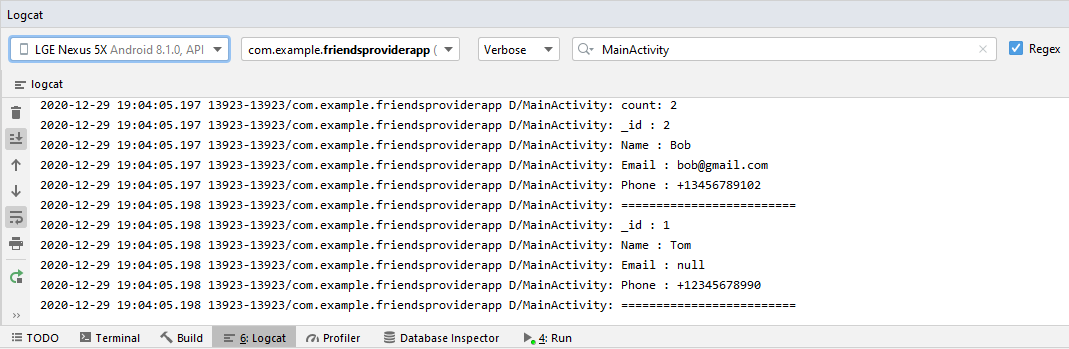
Теперь изменим код класса MainActivity. Для упрощения результаты будем выводить в окне Logcat с помощью метода Log.d():
package com.example.friendsproviderapp;

import androidx.appcompat.app.AppCompatActivity;

import android.content.ContentResolver;
import android.content.ContentValues;
import android.database.Cursor;
import android.net.Uri;
import android.os.Bundle;
import android.util.Log;
import android.view.View;

public class MainActivity extends AppCompatActivity {

    private static final String TAG = "MainActivity";

    @Override
    protected void onCreate(Bundle savedInstanceState) {
        super.onCreate(savedInstanceState);
        setContentView(R.layout.activity_main);
    }
    // получение всех
    public void getAll(View view){
        String[] projection = {
                FriendsContract.Columns._ID,
                FriendsContract.Columns.NAME,
                FriendsContract.Columns.EMAIL,
                FriendsContract.Columns.PHONE
        };
        ContentResolver contentResolver = getContentResolver();
        Cursor cursor = contentResolver.query(FriendsContract.CONTENT_URI,
                projection,
                null,
                null,
                FriendsContract.Columns.NAME);
        if(cursor != null){
            Log.d(TAG, "count: " + cursor.getCount());
            // перебор элементов
            while(cursor.moveToNext()){
                for(int i=0; i < cursor.getColumnCount(); i++){
                    Log.d(TAG, cursor.getColumnName(i) + " : " + cursor.getString(i));
                }
                Log.d(TAG, "=========================");
            }
            cursor.close();
        }
        else{
            Log.d(TAG, "Cursor is null");
        }
    }
    // Добавление
    public void add(View view){
        ContentResolver contentResolver = getContentResolver();
        ContentValues values = new ContentValues();
        values.put(FriendsContract.Columns.NAME, "Sam");
        values.put(FriendsContract.Columns.EMAIL, "sam@gmail.com");
        values.put(FriendsContract.Columns.PHONE, "+13676254985");
        Uri uri = contentResolver.insert(FriendsContract.CONTENT_URI, values);
		Log.d(TAG, "Friend added");
    }

    // Обновление
    public void update(View view){
        ContentResolver contentResolver = getContentResolver();
        ContentValues values = new ContentValues();
        values.put(FriendsContract.Columns.EMAIL, "sammy@gmail.com");
        values.put(FriendsContract.Columns.PHONE, "+55555555555");
        String selection = FriendsContract.Columns.NAME + " = 'Sam'";
        int count = contentResolver.update(FriendsContract.CONTENT_URI, values, selection, null);
		Log.d(TAG, "Friend updated");
    }
    // Удаление
    public void delete(View view){
        ContentResolver contentResolver = getContentResolver();
        String selection = FriendsContract.Columns.NAME + " = ?";
        String[] args = {"Sam"};
        int count = contentResolver.delete(FriendsContract.CONTENT_URI, selection, args);
		Log.d(TAG, "Friend deleted");
    }
}
Разберем отдельные действия, выполняемые в данном коде.
Получение данных
public void getAll(View view){
	String[] projection = {
		FriendsContract.Columns._ID,
		FriendsContract.Columns.NAME,
		FriendsContract.Columns.EMAIL,
		FriendsContract.Columns.PHONE
	};
	ContentResolver contentResolver = getContentResolver();
	Cursor cursor = contentResolver.query(FriendsContract.CONTENT_URI,
		projection,
		null,
		null,
		FriendsContract.Columns.NAME);
	if(cursor != null){
		Log.d(TAG, "count: " + cursor.getCount());
		// перебор элементов
		while(cursor.moveToNext()){
			for(int i=0; i < cursor.getColumnCount(); i++){
				Log.d(TAG, cursor.getColumnName(i) + " : " + cursor.getString(i));
			}
			Log.d(TAG, "=========================");
		}
		cursor.close();
	}
	else{
		Log.d(TAG, "Cursor is null");
	}
}
Взаимодействие с провайдером контента осуществляется через объект ContentResolver. Для получения данных вызывается метод query(), по сути он представляет вызов метод query провайдера контента. В метод query передается uri - путь к данным, projection - набор столбцов для извлечения, выражение выборки и параметры для него и название столбца, по которому проводится сортировка.
Метод возвращает курсор Cursor, который с помощью метода moveToNext() можно перебрать и получить отдельные данные. Метод getColumnName()
возвращает название столбца, а getString() - собственно значение этого столбца:
Получение одного объекта по id:
String[] projection = {
	FriendsContract.Columns._ID,
	FriendsContract.Columns.NAME,
	FriendsContract.Columns.EMAIL,
	FriendsContract.Columns.PHONE
};
ContentResolver contentResolver = getContentResolver();
Cursor cursor = contentResolver.query(FriendsContract.buildFriendUri(2),
	projection, null, null, FriendsContract.Columns.NAME);
if(cursor != null){
	while(cursor.moveToNext()){
		for(int i=0; i < cursor.getColumnCount(); i++){
			Log.d(TAG, cursor.getColumnName(i) + " : " + cursor.getString(i));
		}
	}
	cursor.close();
}
В данном случае получаем объект с _id=2.
Добавление данных
Добавление данных:
ContentResolver contentResolver = getContentResolver();
ContentValues values = new ContentValues();
values.put(FriendsContract.Columns.NAME, "Sam");
values.put(FriendsContract.Columns.EMAIL, "sam@gmail.com");
values.put(FriendsContract.Columns.PHONE, "+13676254985");
Uri uri = contentResolver.insert(FriendsContract.CONTENT_URI, values);
Для добавления применяется метод insert, который принимает путь URI и добавляемые данные в виде ContentValues.
Обновление данных
Обновление данных:
ContentResolver contentResolver = getContentResolver();
ContentValues values = new ContentValues();
values.put(FriendsContract.Columns.EMAIL, "sammy@gmail.com");
values.put(FriendsContract.Columns.PHONE, "+55555555555");
String selection = FriendsContract.Columns.NAME + " = 'Sam'";
int count = contentResolver.update(FriendsContract.CONTENT_URI, values, selection, null);
В данном случае обновляются данные у всех объектов, у которых "Name=Sam". Критерий обновления передается через третий параметр.
Естественно с помощью выражения SQL можно задать любою логику выборки объектов для обновления. И для большего удобства мы можем вводить в него данные с помощью параметров, которые задаются знаком вопроса:
ContentResolver contentResolver = getContentResolver();
ContentValues values = new ContentValues();
values.put(FriendsContract.Columns.NAME, "Sam");
String selection = FriendsContract.Columns.NAME + " = ?";
String args[] = {"Sam Scromby"};
int count = contentResolver.update(FriendsContract.CONTENT_URI, values, selection, args);
В этом случае с помощью четвертого параметра передается массив значений для параметров выражения выборки.
Но в примерах выше обновлялись все строки в бд, которые имели, например, имя "Sam". Но также можно обновлять и один объект по id. Например, обновим строку с _id=3:
ContentResolver contentResolver = getContentResolver();
ContentValues values = new ContentValues();
values.put(FriendsContract.Columns.NAME, "Sam");
values.put(FriendsContract.Columns.EMAIL, "sam@gmail.com");
int count = contentResolver.update(FriendsContract.buildFriendUri(3), values, null, null);
Удаление данных
Удаление данных по общему условию:
ContentResolver contentResolver = getContentResolver();
String selection = FriendsContract.Columns.NAME + " = ?";
String[] args = {"Sam"};
int count = contentResolver.delete(FriendsContract.CONTENT_URI, selection, args);
В данном случае удаляются все строки, у которых Name=Sam.
Удаление по id:
ContentResolver contentResolver = getContentResolver();
int count = contentResolver.delete(FriendsContract.buildFriendUri(2), null, null);
В данном случае удаляется строка с _id=2.
- Глава 1. Начало работы с Android
- Глава 2. Основы создания интерфейса
- Создание интерфейса в коде java
- Определение интерфейса в файле XML. Файлы layout
- Определение размеров
- Ширина и высота элементов
- Внутренние и внешние отступы
- ConstraintLayout
- Размеры элементов в ConstraintLayout
- Цепочки элементов в ConstraintLayout
- Программное создание ConstraintLayout и позиционионирование
- LinearLayout
- RelativeLayout
- TableLayout
- FrameLayout
- GridLayout
- ScrollView
- Вложенные layout
- Gravity и позиционирование внутри элемента
- Глава 3. Основные элементы управления
- Глава 4. Ресурсы
- Глава 5. Activity
- Глава 6. Работа с изображениями
- Глава 7. Адаптеры и списки
- ListView и ArrayAdapter
- Ресурс string-array и ListView
- Выбор элемента в ListView
- Добавление и удаление в ArrayAdapter и ListView
- Расширение списков и создание адаптера
- Оптимизация адаптера и View Holder
- Сложный список с кнопками
- Выпадающий список Spinner
- Виджет автодополнения AutoCompleteTextView
- GridView
- RecyclerView
- Обработка выбора элемента в RecyclerView
- Глава 8. Стили и темы
- Глава 9. Меню
- Глава 10. Фрагменты
- Глава 11. Многопоточность
- Глава 12. Работа с сетью. WebView
- Глава 13. Работа с мультимедиа
- Глава 14. Настройки и состояние приложения
- Глава 15. Работа с файловой системой
- Глава 16. Работа с базами данных SQLite
- Глава 17. Перелистывание страниц и ViewPager2
- Глава 18. Сервисы
- Глава 19. Диалоговые окна
- Глава 20. Анимация
- Глава 21. Провайдеры контента
- Глава 22. JSON
- Глава 23. Работа с XML